-------------------------------------
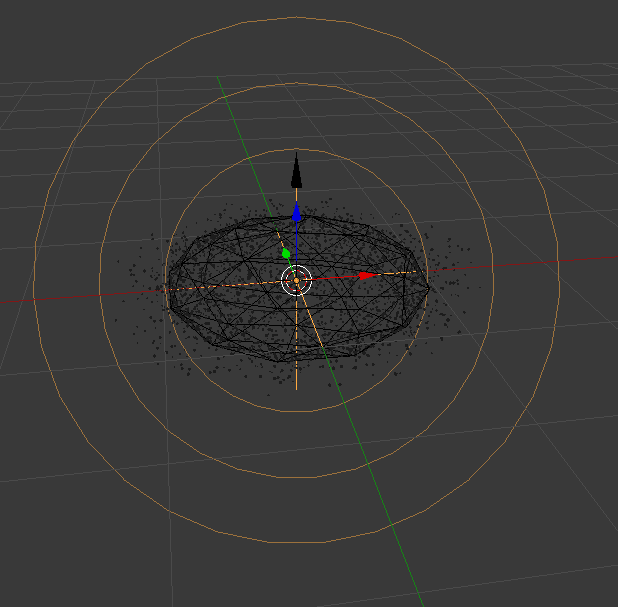
1.新增一個 Icosphere > Z軸縮小把它壓扁
2.右邊物體介面>Display-Maximum draw type: Wire
3.增加ParticleSystem
4.另一圖層新增一個 Icosphere,T面板 Subdivision:1 >如下圖設定Starwhite Material

5.再複製兩個,黃色staryellow和藍色starblue
再複製如下圖

6.再從starwhite複製出 starwhite inner ,命名為innerstarm
Material設定如下

7.選取那6個,Ctrl+G >命名 stargroup

8.回到一開始Maximum draw type: Wire的Icosphere
粒子系統命名為Mainstar
最終畫格設為1000
粒子面板>Emission-Lifetime : 2000 / -End: 50
Field weight-Gravity : 0
Velocity-Normal : 0.05
Physics-Random size : 0.54
Render-Group-Dupli Group: StarGroup / Emitter 取消勾選
現在的Render 畫面應該如下圖

Render-size : 0.01
Physics-Random size : 0.83

9. 新增 Force Field > Vortex,位置如下圖
可見粒子向中心聚攏

10.Vortex > 右邊物裡面板 > Shape: Point
Strentgh : -1 / Flow : 0.96 / Noise : 0.780

11.選擇 Icosphere>右邊粒子系統面板>Emission-Number:3000

12.新增Force Field > Force
右邊物裡面板>Strentgh : -0.2 / Noise : 0.1
-Fall off : Tube , power : 1.7
13.複製Icosphere,縮小

新增一粒子系統>命名為innerstar

>Emission-Number:2000 / Lifetime : 2670 / Emit form: volume
14. Mainstar粒子也設定為Emission-Emit form: volume
15.Mainstar和innerstar的Emission-Emit form : 取消勾選Even Distribution
16.innerstar粒子面板:Field weight-Gravity : 0
Velocity-Normal : 0.2
Render- Emitter 取消勾選

17. innerstar和Mainstar粒子面板:physics-Force-Brownian : 0.25
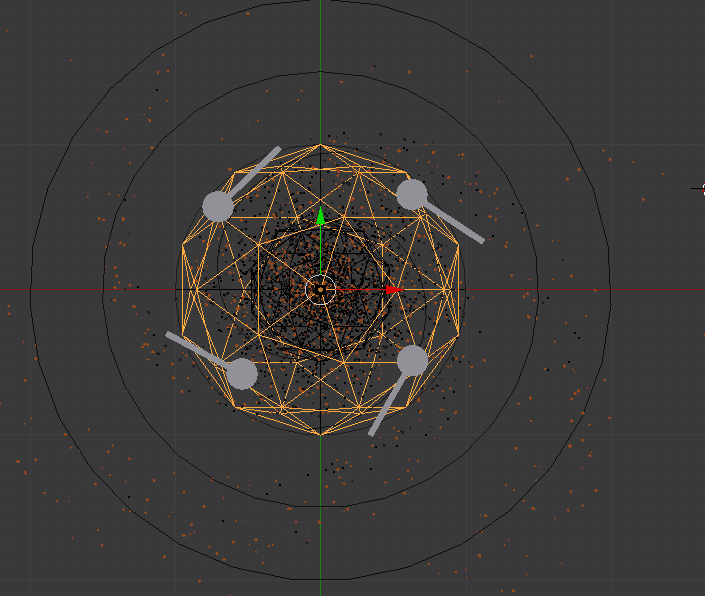
18.新增圓柱,點選兩個面,E擠出修改形狀,結果如下圖

19.選取一圓柱,物裡面板>添加 Collision
勾選Kill Partical
Particle : Permeability : 0.195
其他圓柱也一樣設定

20.選取圓柱>物體面板-Ray visibility
全部取消勾選 (四個圓柱都一樣設定)

21.把大的Icosphere複製,再放大、壓扁

最小的Icosphere增加一點厚度

影片時間15:00
22.要凍結住某一粒子畫面 (ex.192畫格)
選擇小Icosphere >Mainstar粒子面板 > Field Weights > All 按 "I"
physics-Force-Brownian 、Damp & -Integration-Timestep 按 "I"
Velocity-Normal 按 "I"
23.選擇小Icosphere > Innerstar粒子面板 > Field Weights > All 按 "I"
physics-Force-Brownian 、Damp
Velocity-Normal 按 "I"
24.選取下一個畫格 (ex.193畫格)
Mainstar粒子面板 >Velocity-Normal 設定為0,按 "I"
physics-Force-Brownian設定為0,按 "I"、Damp設定為1,按 "I"、
& -Integration-Timestep 設定為0,按 "I"
Field Weights > All設定為0 按 "I"
Innerstar粒子面板 >Velocity-Normal 設定為0,按 "I"
physics-Force-Brownian設定為0,按 "I"、Damp設定為1,按 "I"
& -Integration-Timestep 設定為0,按 "I"
Field Weights > All設定為0 按 "I"
25.算繪面板 > Light Paths>勾選 No caustics
Sampling>Render : 15
26.算繪層面板 > Passes>勾選 Material Index
27. F12 視窗變成UV/Image Editor 的 Render Result
28.打開 Node Editor 視窗,勾選Uses Nodes
>Add-Convert-ID Mask
如下圖連接,算繪結果的顏色是相反的

將ID Mask-index 設定為1,顏色會恢復正常
29.
Innerstar粒子面板 >Render >Object: Inner star

星星太大顆了>Physics-size 設為0.01
30.目前節點調整如下

31.ID Mask-index 設定為1,添加mix節點


32.Add > Filter-Glaregk設定如下 (光暈效果)
Fog Glow、Threshold : 0、Mix : 1


33.再添加mix節點,模式改成Add,設定如下

34.複製Glare,連接位置如下


35.添加Color-Gamma,數值1.1,可降低周邊的光暈亮度


36.再複製Glare,連結位置如下圖
模式改為Simple star,解析度品質為High
iteration : 5 / Mix : -0.7 / Threshold : 0.75


37. 複製Add,連結位置為原先的Add 和 Gamma之間
新增Filter - Blur,模式為fast Gaussian ,勾選Relative,Y/X : 10%
連結位置如下圖


如果覺得模糊效果太多,可以改變Add-Fac、或是改變Y/X
38.世界面板>Color : Image texture 開啟銀河照片
Vector: Generated 、 Box
39.將開始畫格改到208格
打開有攝影機的圖層,並新增一個Path

影片時間 25:00
40. 選取Path,進入編輯模式
N面板>Curve Display - Normal 勾選與否可觀看路徑的方向
將路徑位置調整如下圖 (串起攝影機>>>>星雲)

調整為想要讓攝影機移動的路徑
可以W>Subdiviosn 增加路徑的調整
41.物體資料面板 > 增加 Render U : 24 讓路徑移動更平滑
42.設定影片長度:影片目標是210~1000畫格
共790畫格數
選取路徑>物體資料面板 > Path Animation-Frame : 790
43.選取攝影機>物體約束面板 > Follow Path ,選擇剛剛建立的路徑
會發現攝影機位置跑掉了
44.選取路徑> Ctrl +A : Rotation & Scale
攝影機位置會回來

移動攝影機,接到路徑的起點

45. 物體約束面板 >點擊Animate Path ,再按撥放鍵
但是會發現 210畫格時攝影機已經不在路徑起點了
物體約束面板 > Offset : 210
再按撥放鍵,問題解決了~
46. 為了讓鏡頭鎖定在星雲中心
新增一Empty> Cube 在中心

47.選取攝影機 > 物體約束面板 >Track to : Empty
To: -Z / Up : Y